



 Înapoi la listă
WooCommerce plugin for ecommerce platforms
With the factureaza.ro plugin for WooCommerce you issue and send the invoices for your online store's orders, right from the WordPress admin.
You need WordPress 6.7 or newer, PHP 7.2 or newer, and WooCommerce. The plugin is tested with WordPress 6.9 and WooCommerce 10.6.
Installing
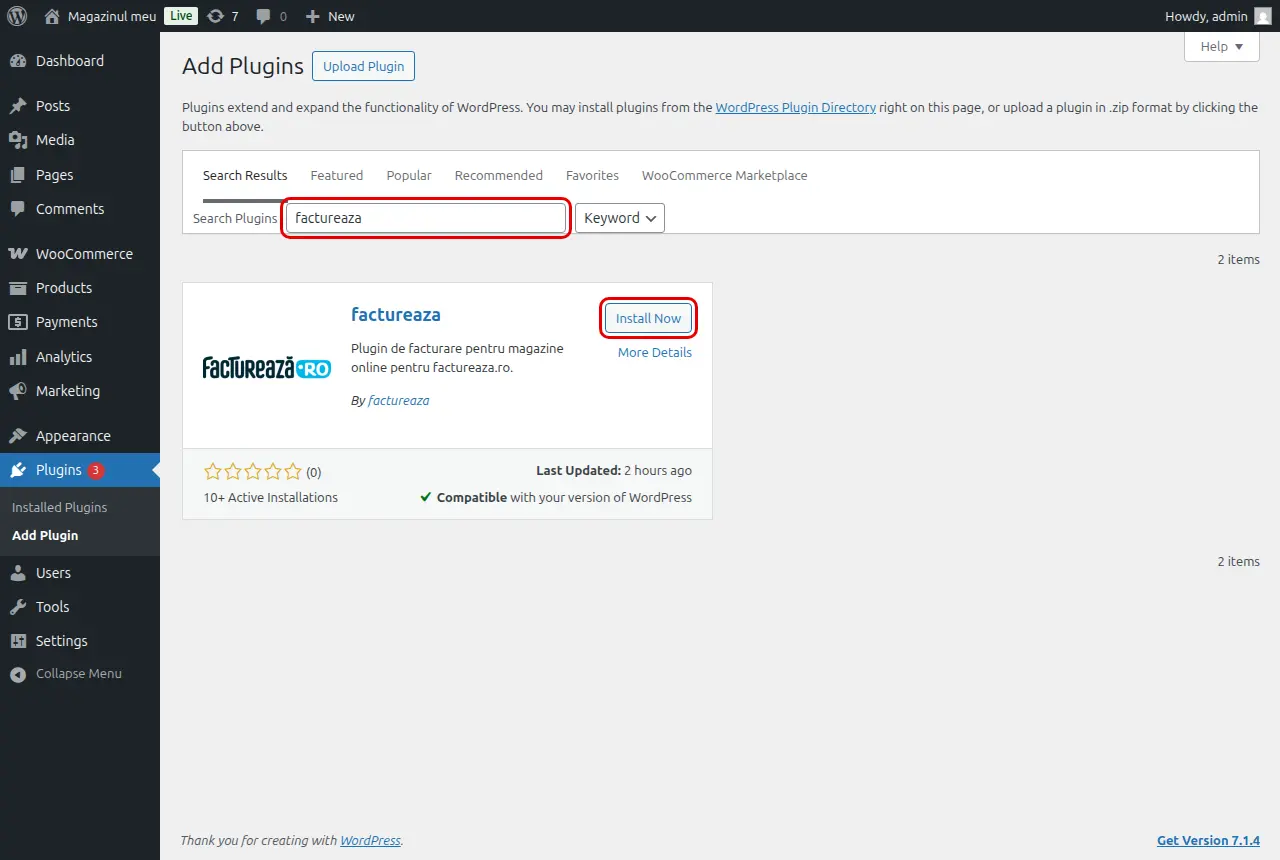
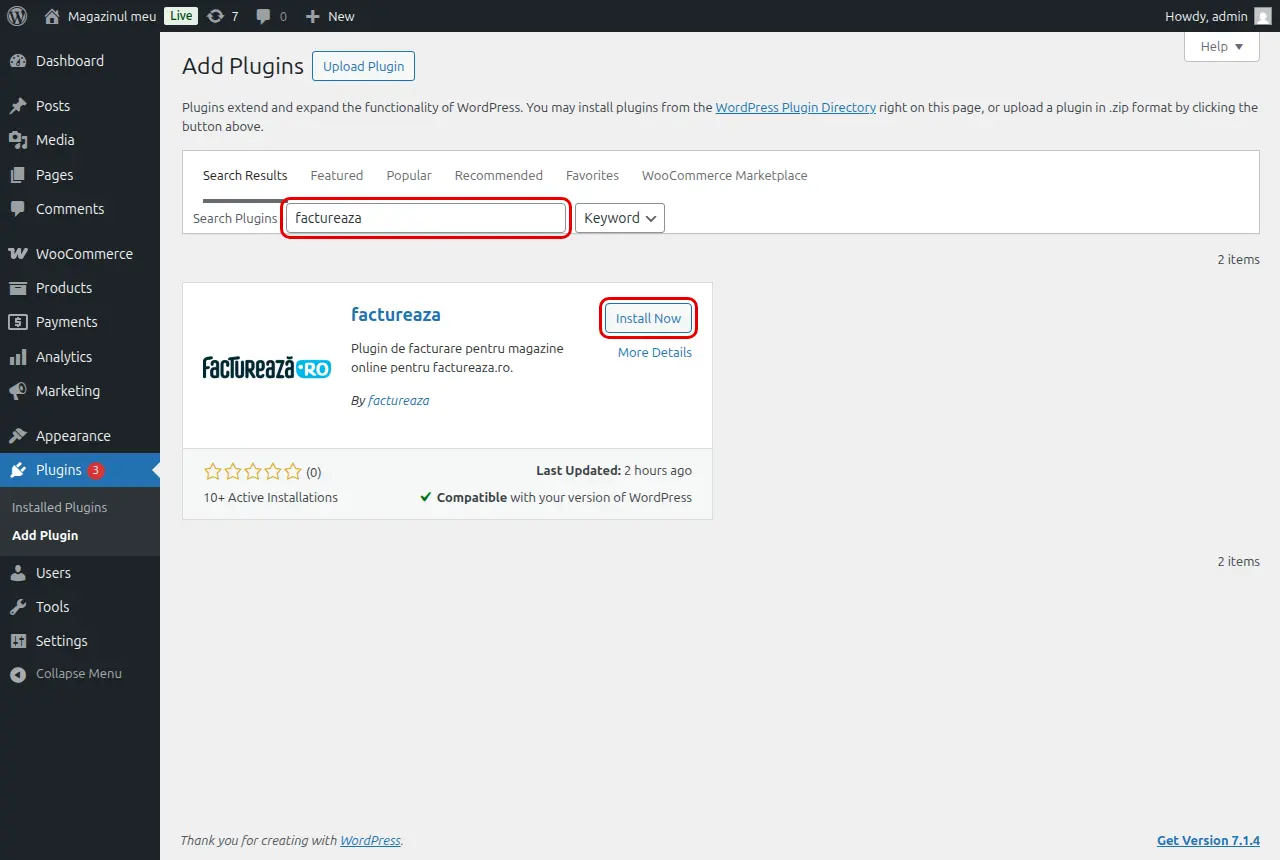
In the WordPress admin, go to Plugins › Add Plugin, search for "factureaza", click Install Now, then Activate. Updates then come through WordPress, like for any other plugin.
Installing from a zip file
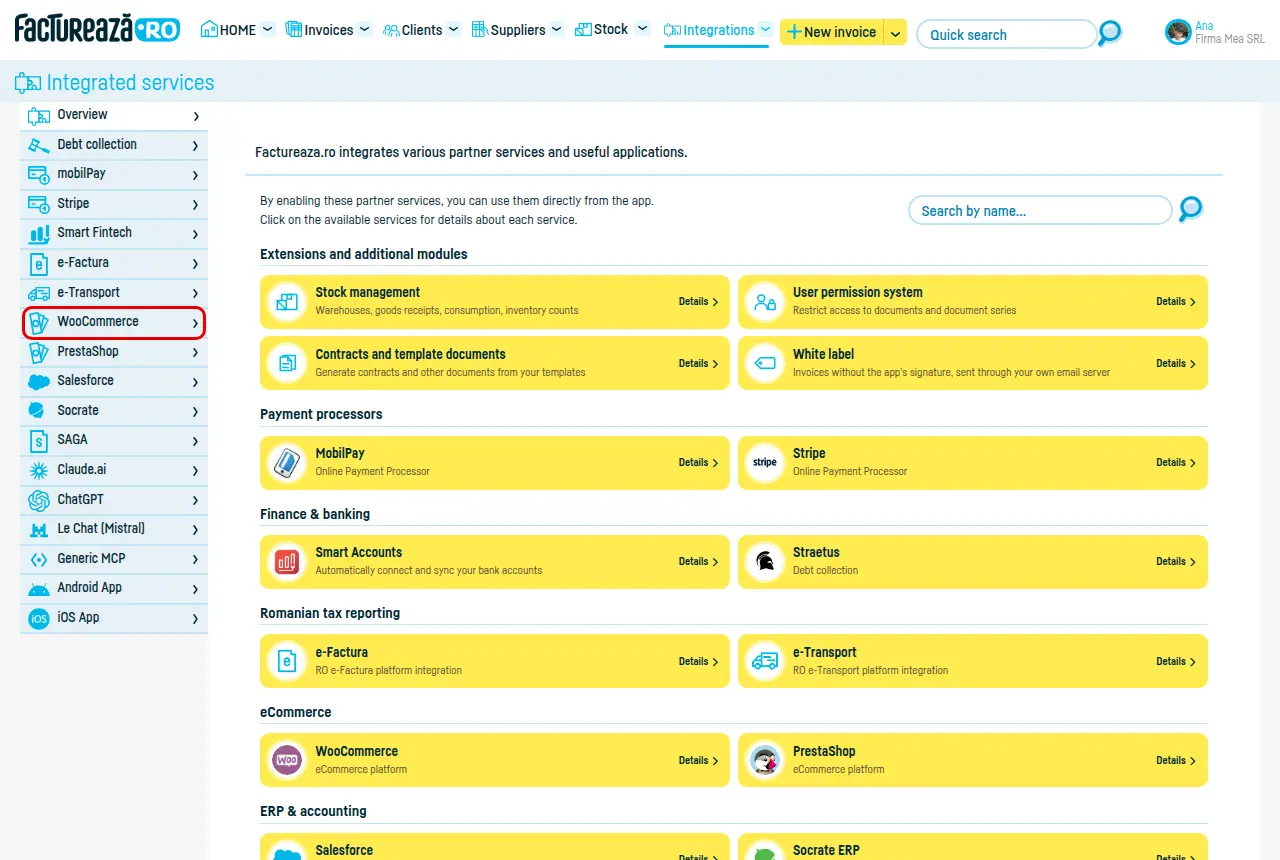
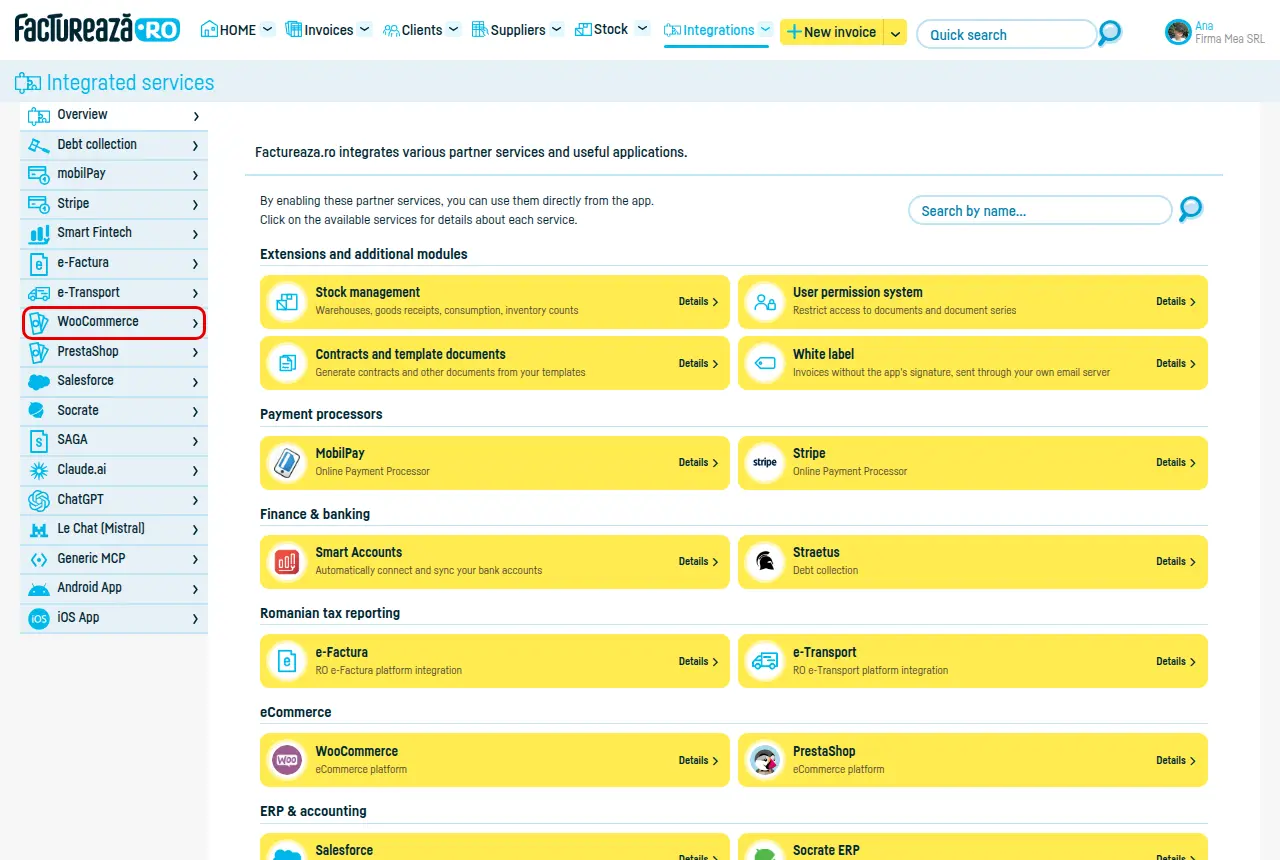
You can also download the plugin from your factureaza.ro account. Open Integrations and choose WooCommerce:
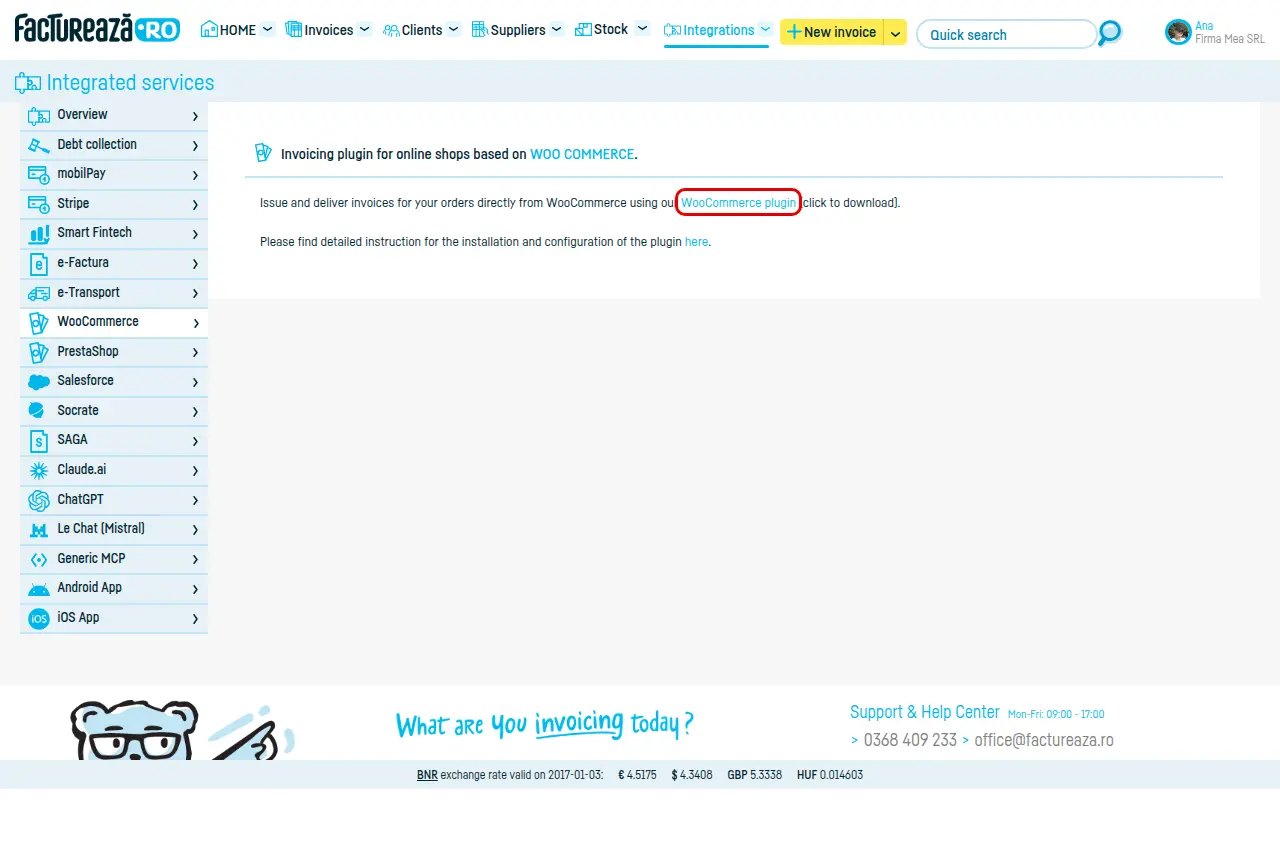
Then click WooCommerce plugin:
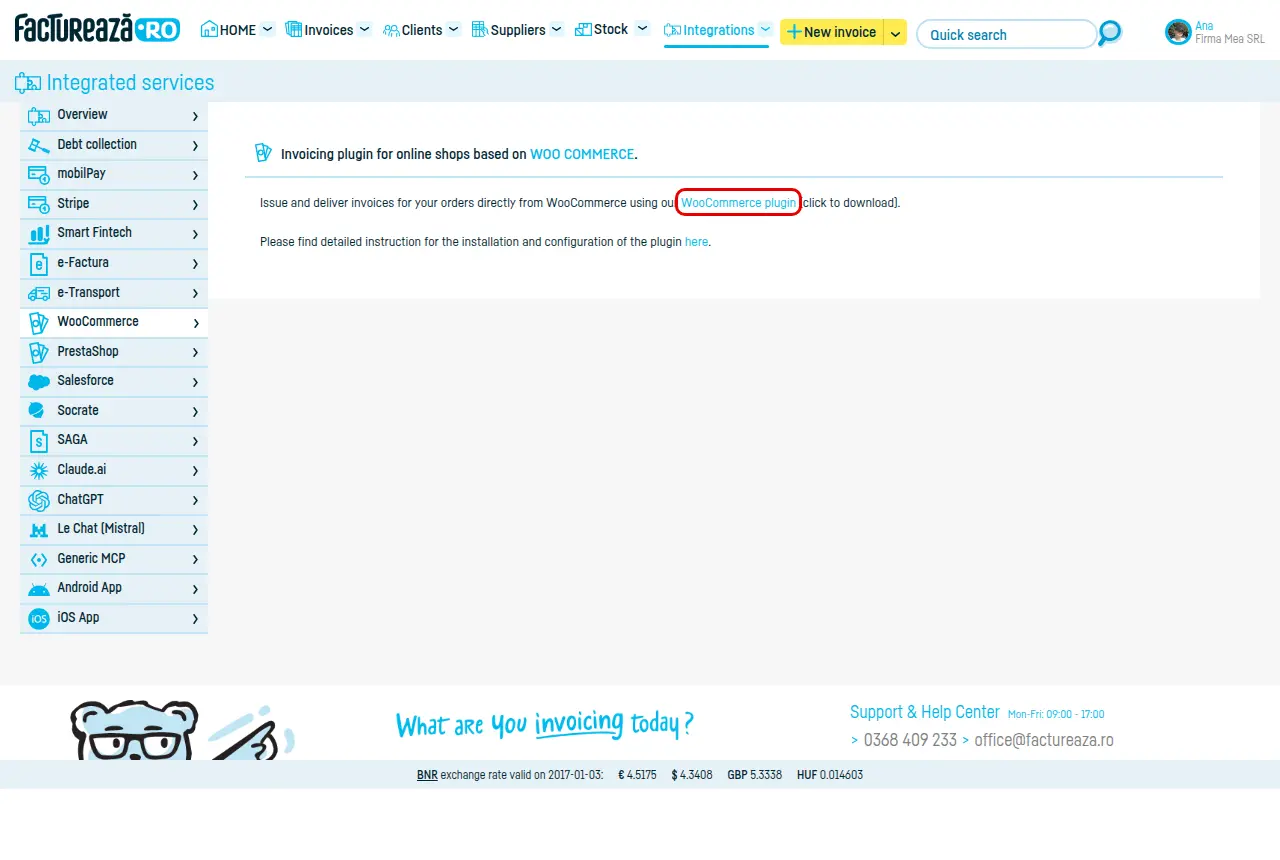
In WordPress, under Plugins › Add Plugin, click Upload Plugin, choose the zip file, click Install Now, then Activate Plugin.
With an FTP client, unzip the file, upload the factureaza folder to wp-content/plugins, then activate the plugin under Plugins › Installed Plugins.
Connecting to your account
The plugin works through the factureaza.ro API, so it needs an API key.
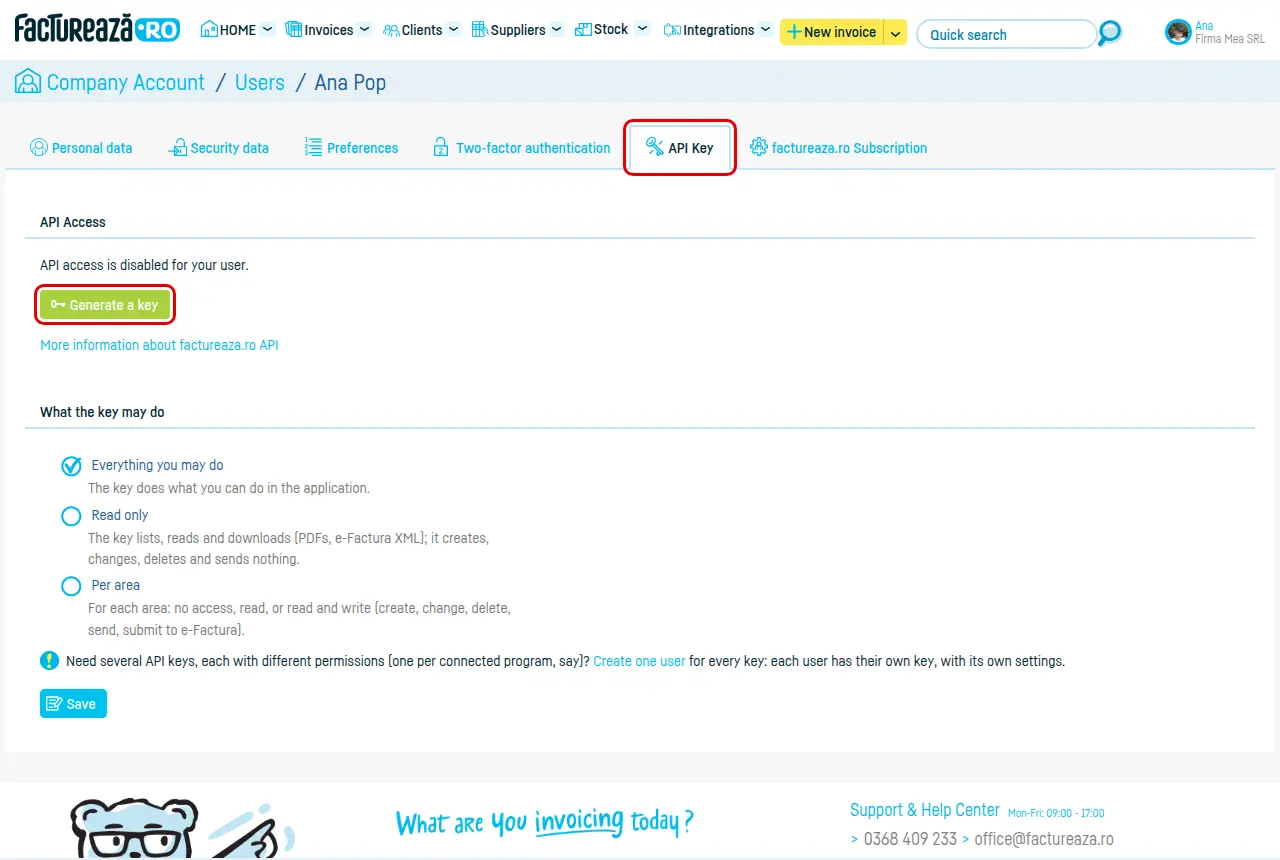
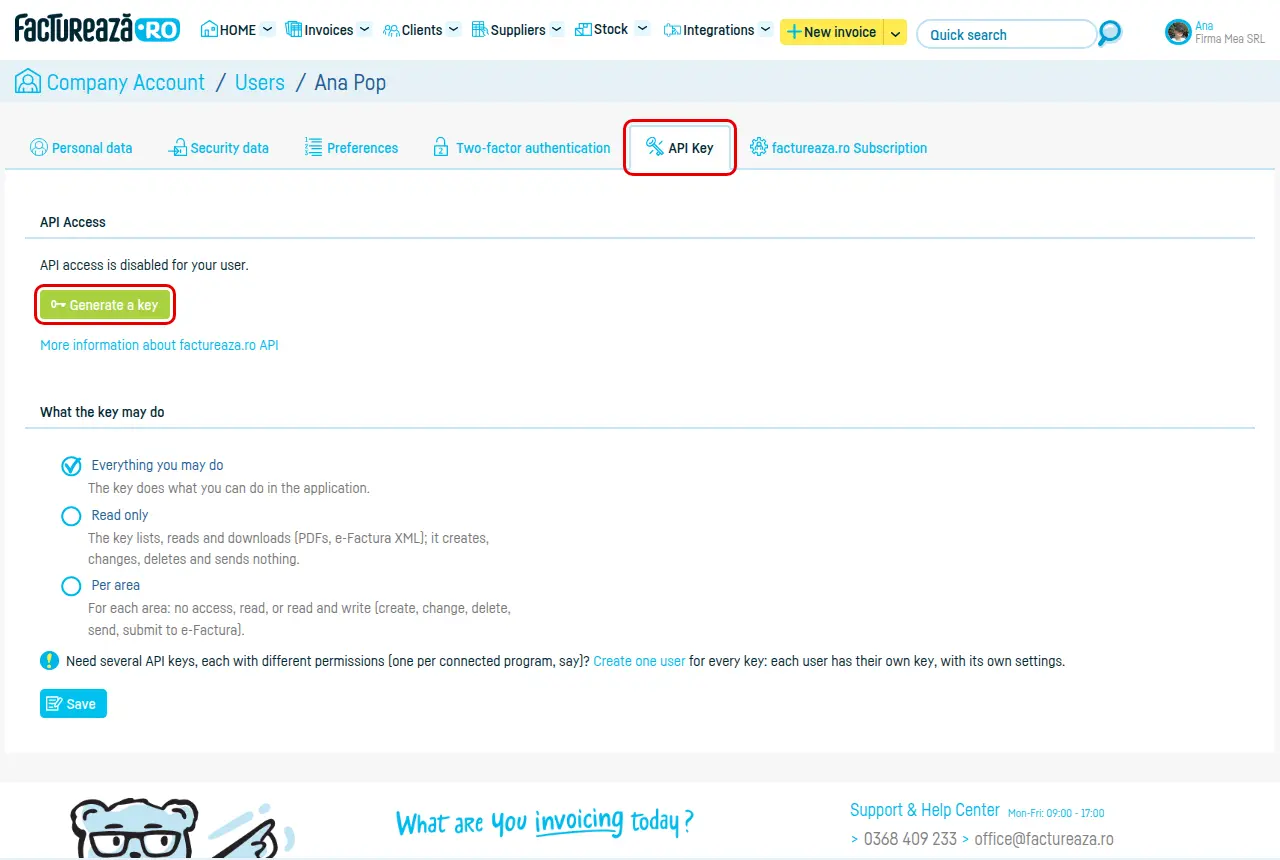
In factureaza.ro, go to User Profile, the API Key tab, and click Generate a key. Then click Show the key, confirm your password and copy the key. Under What the key may do, leave Everything you may do: with a Read only key the plugin cannot issue invoices. If the page says API access is not available for your account, your subscription does not include the API.
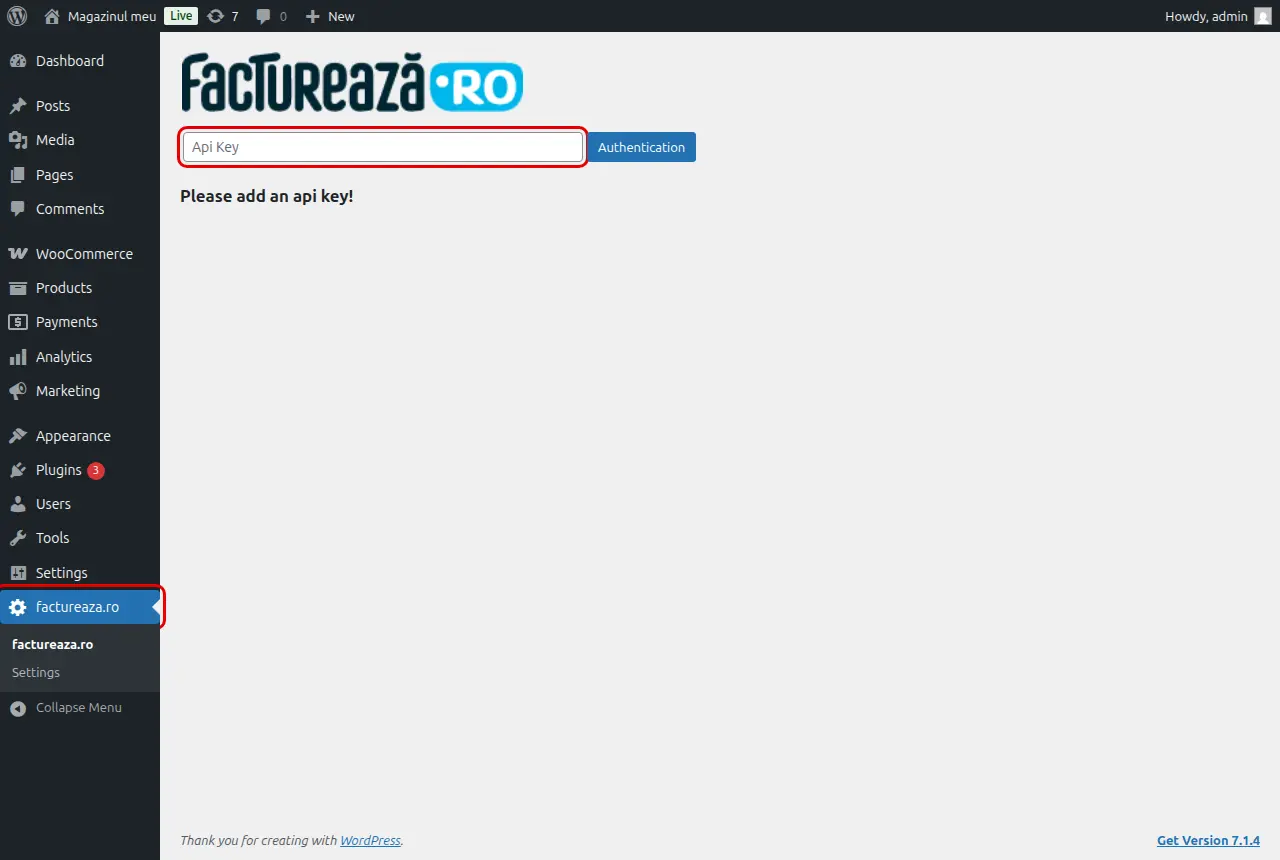
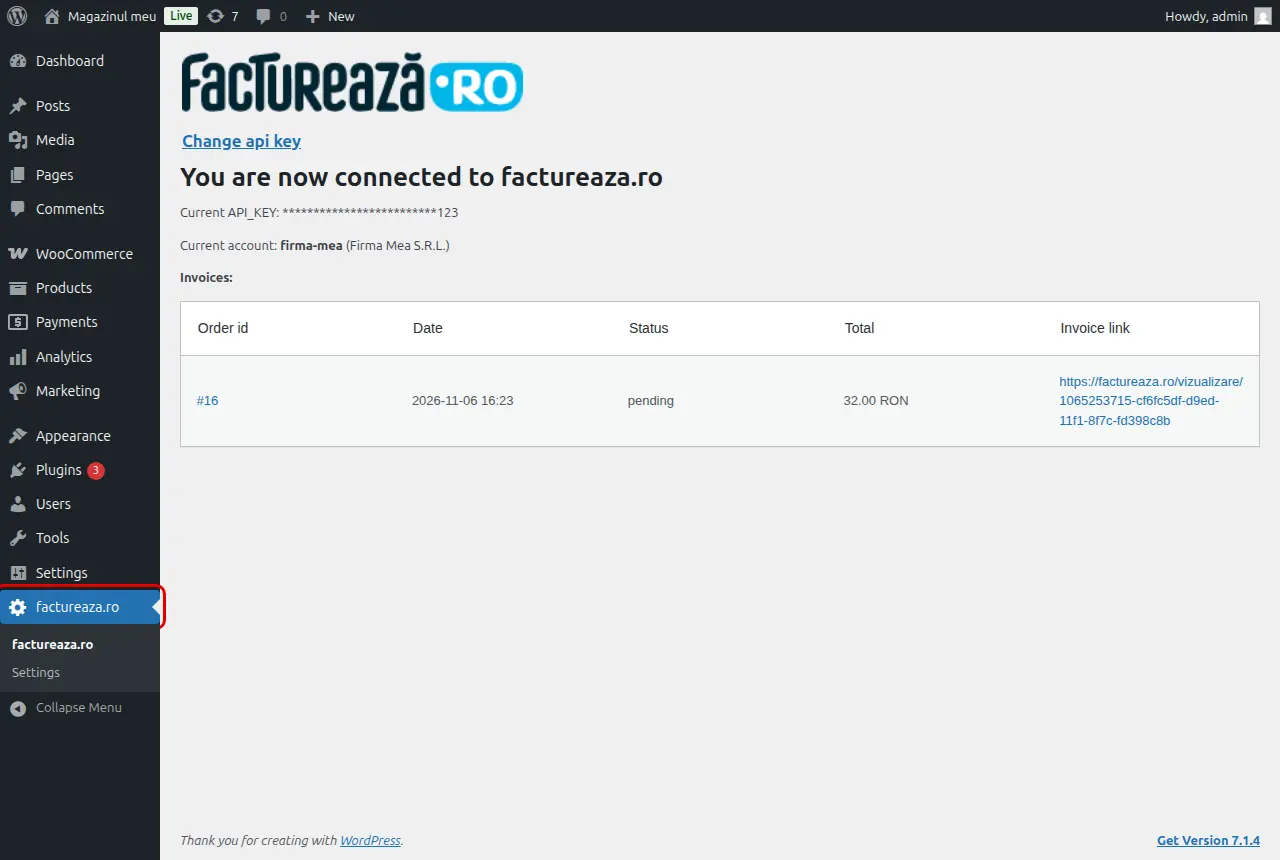
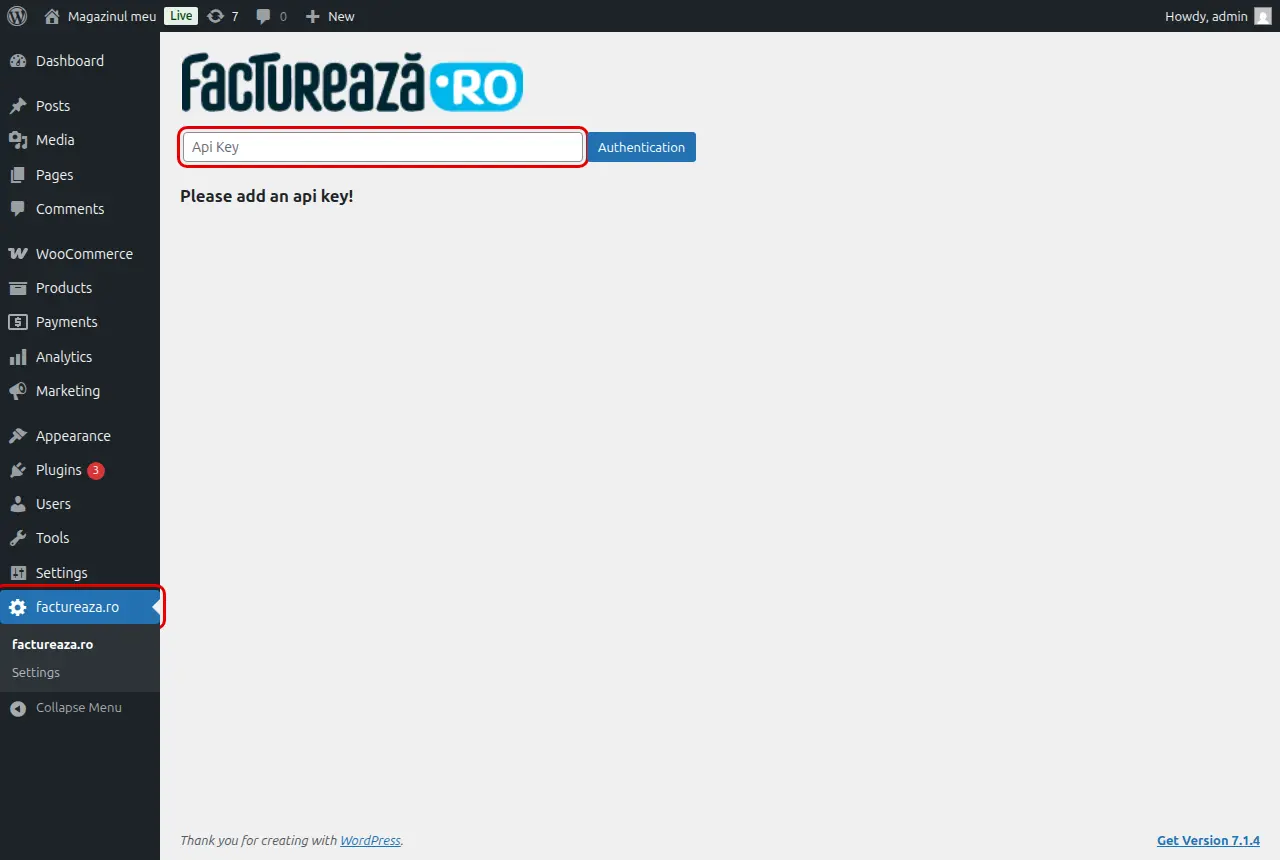
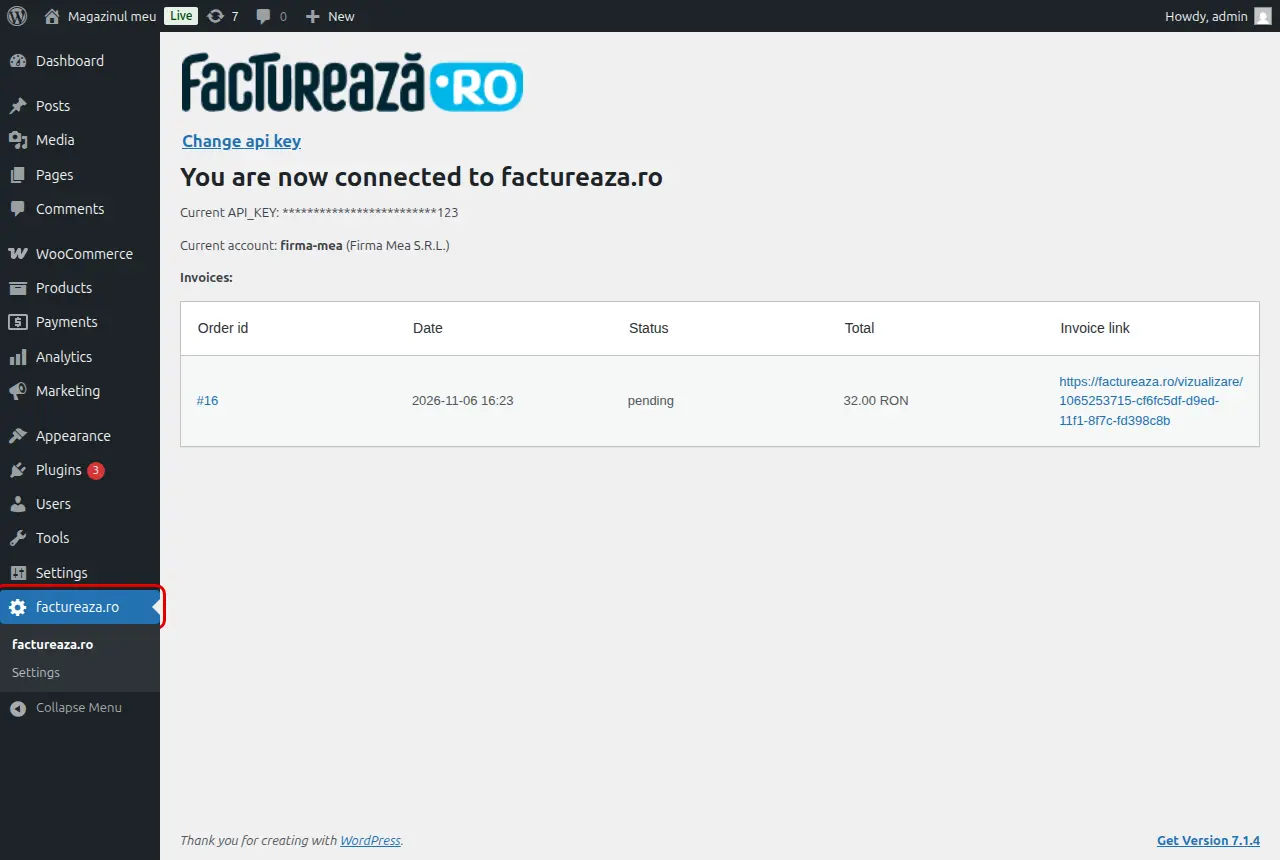
In the WordPress admin, open factureaza.ro in the left menu, paste the key into the Api Key field and click Authentication. The page confirms the connection: You are now connected to factureaza.ro.
Settings
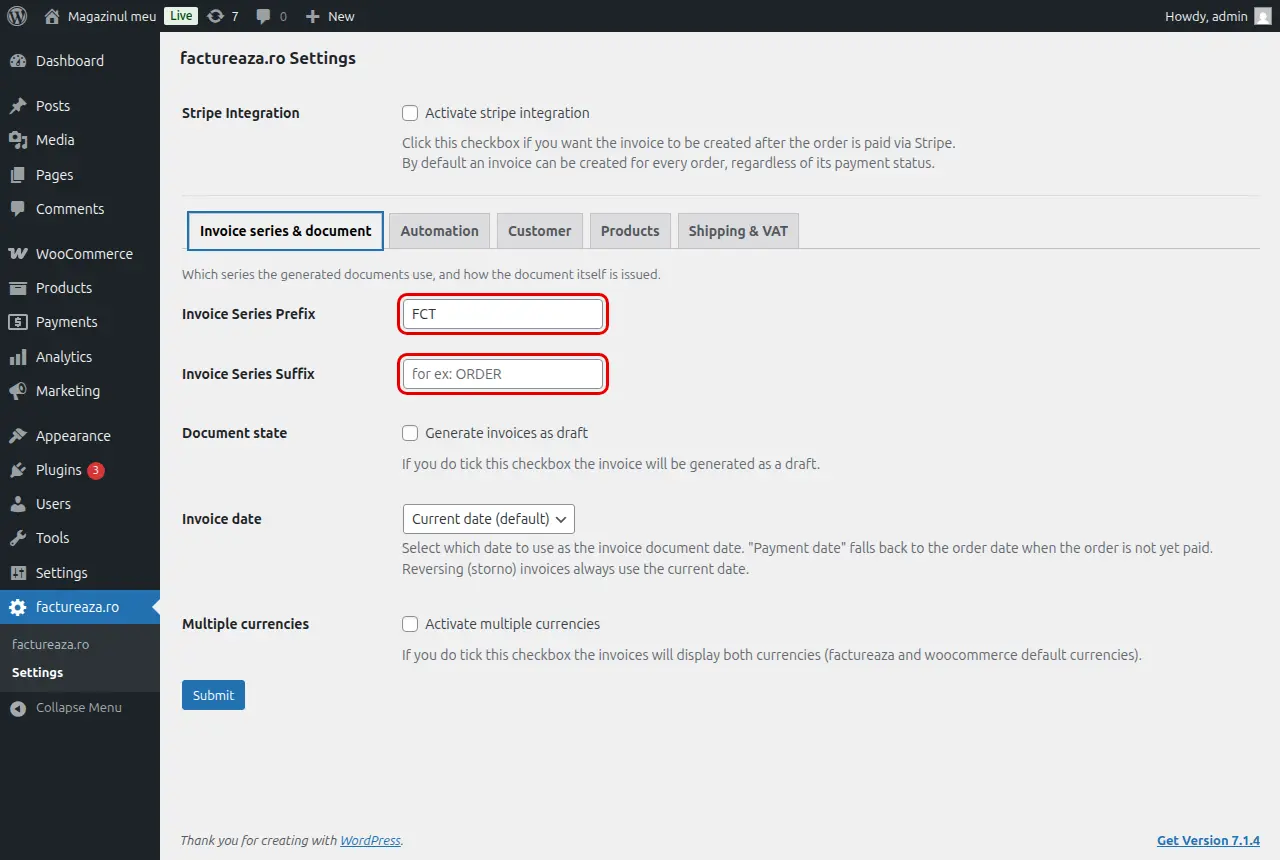
The settings are under factureaza.ro › Settings, grouped in tabs. After changing them, click Submit.
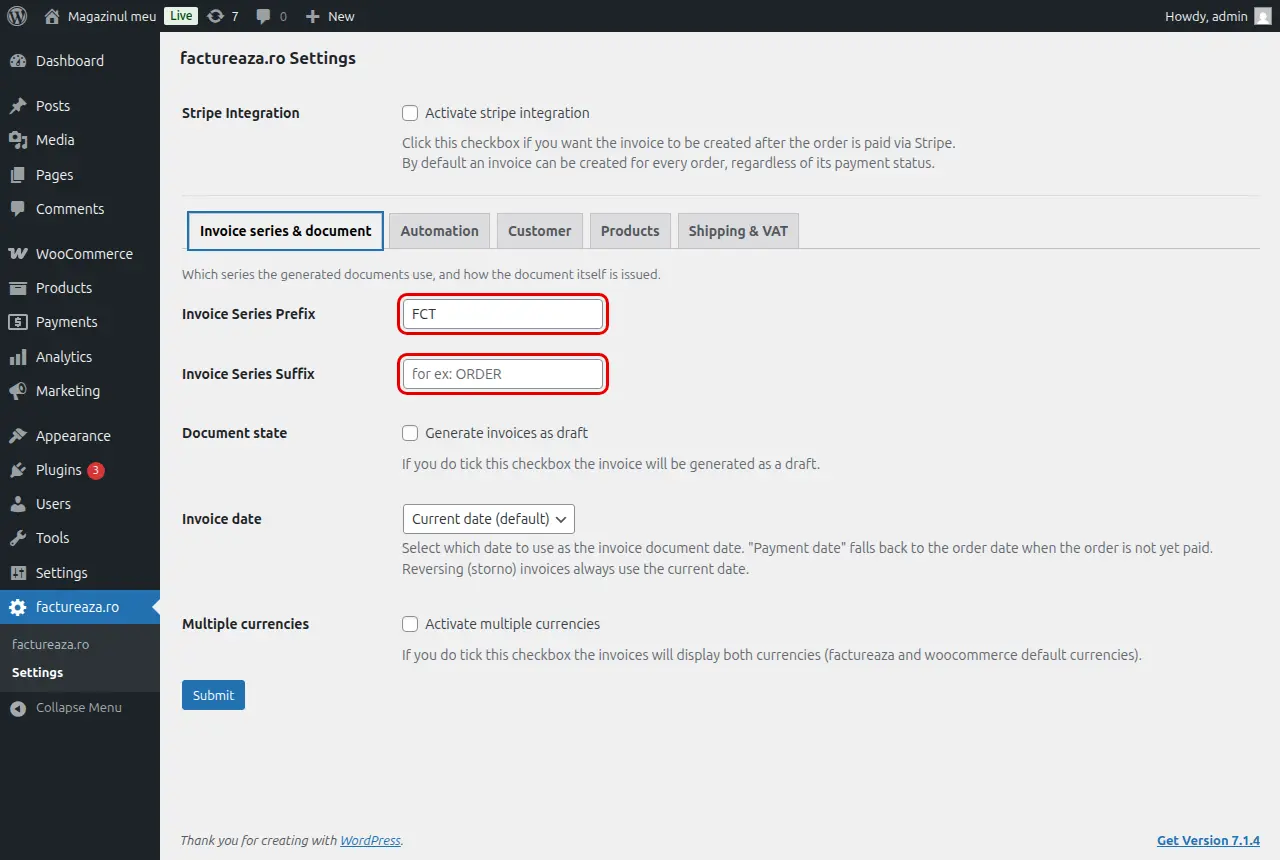
Under Invoice series & document you name the series the invoices are issued on, with Invoice Series Prefix and/or Invoice Series Suffix. The series must already exist in factureaza.ro, and the year defaults to the current one. Here you also choose whether invoices are issued as drafts (Document state), which date they carry (Invoice date) and whether they show two currencies (Multiple currencies).
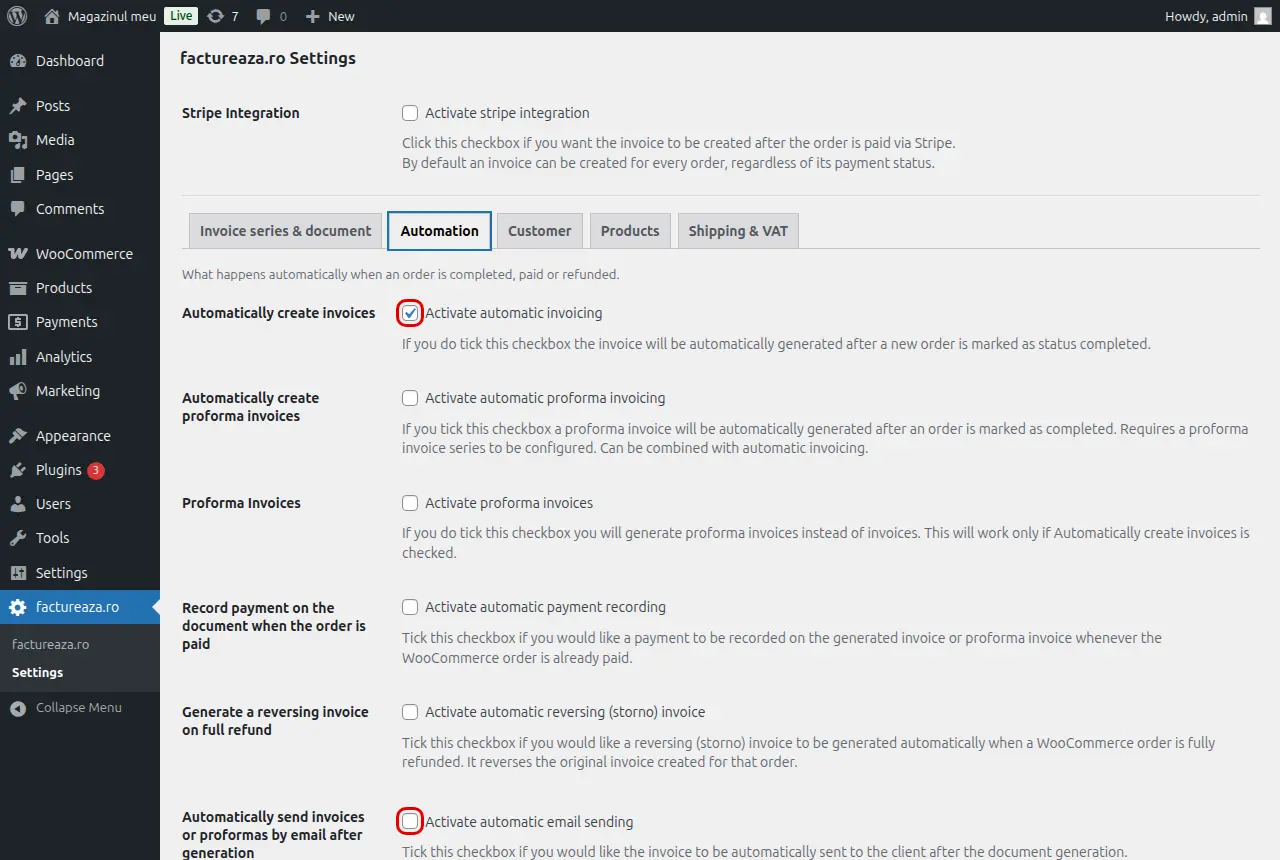
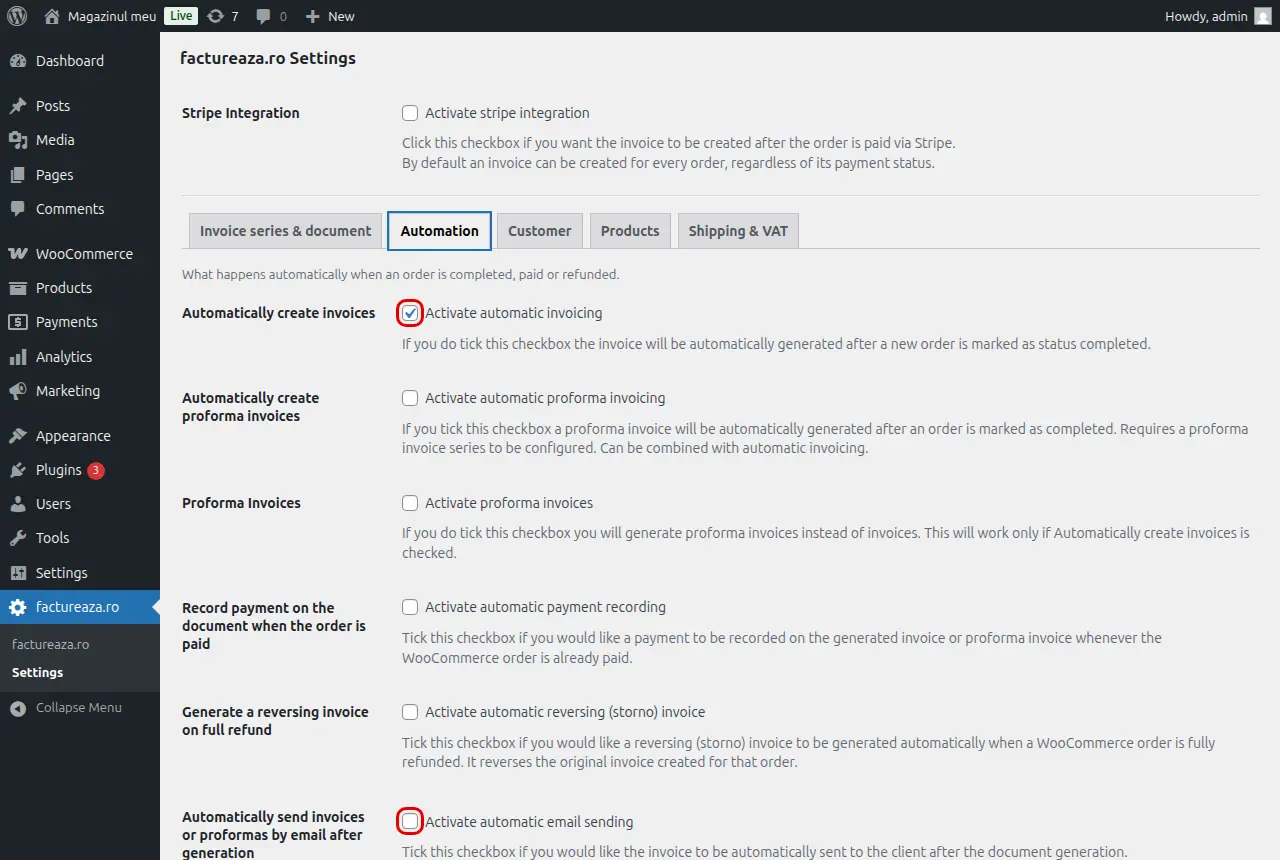
Under Automation you choose what happens by itself. Automatically create invoices issues the invoice when the order reaches the Completed status, and Automatically send invoices or proformas by email after generation emails it to the customer. Here you also turn on proforma invoices, payment recording and a reversing invoice on a full refund.
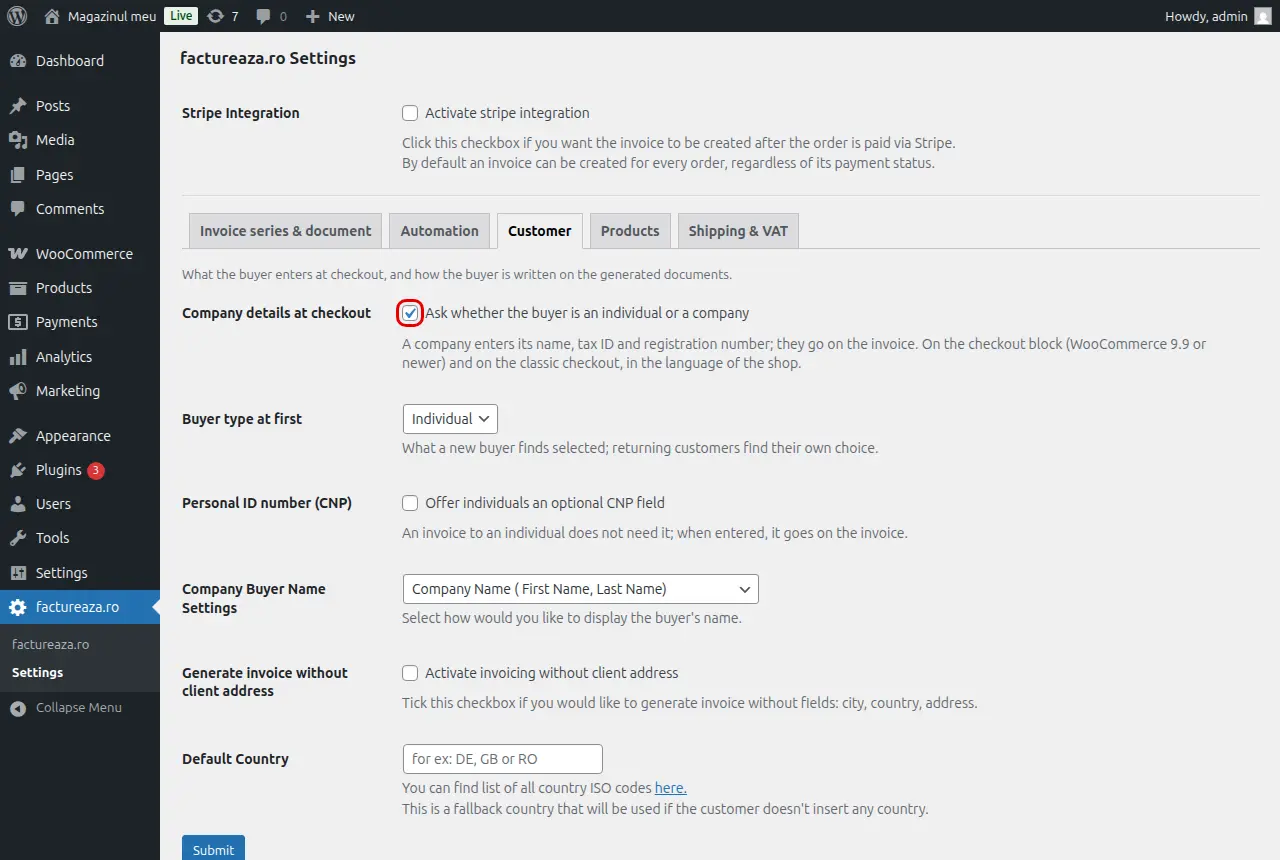
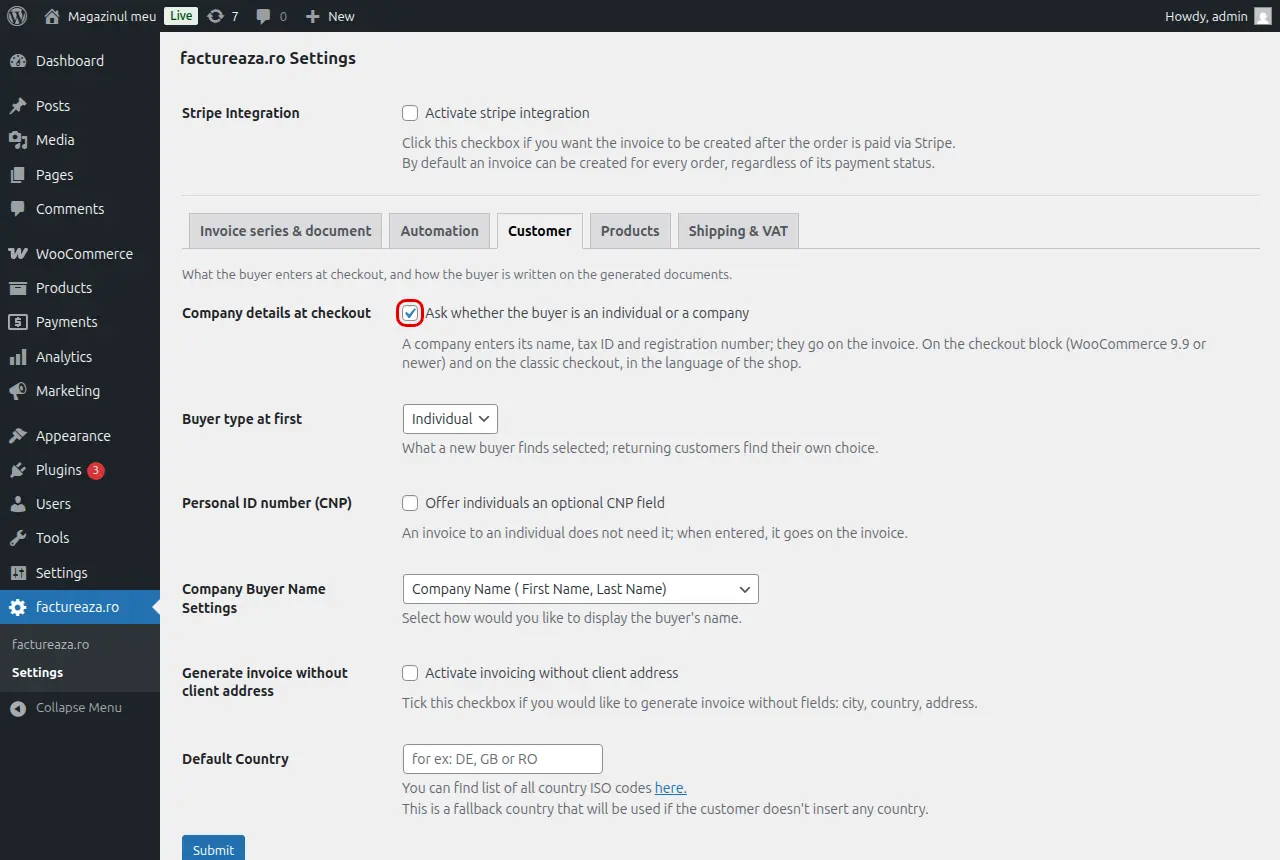
Under Customer you choose what the checkout asks for and how the buyer is written on the invoice. Under Products and Shipping & VAT you set how products and shipping appear on the invoice.
Issuing invoices
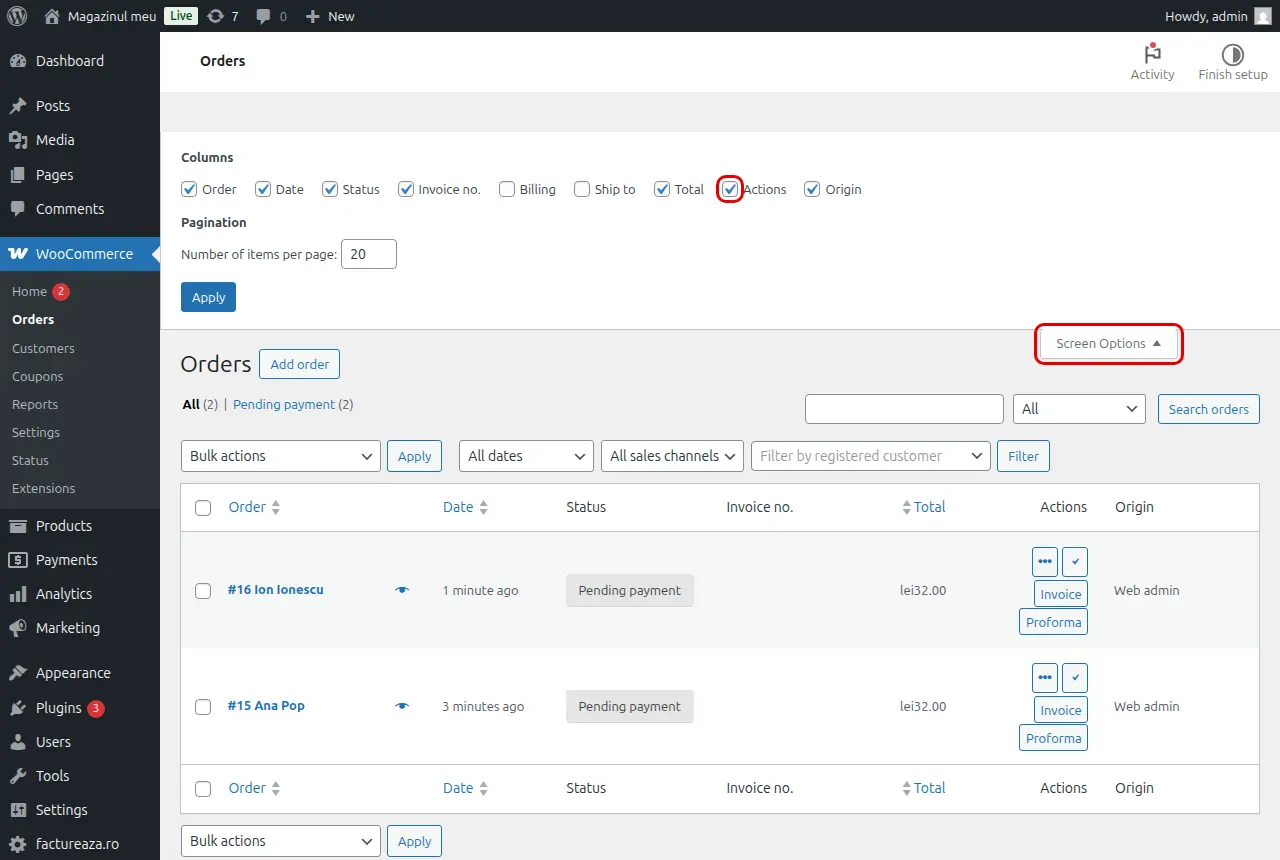
If you did not turn on automatic invoicing, you issue the invoices from WooCommerce › Orders.
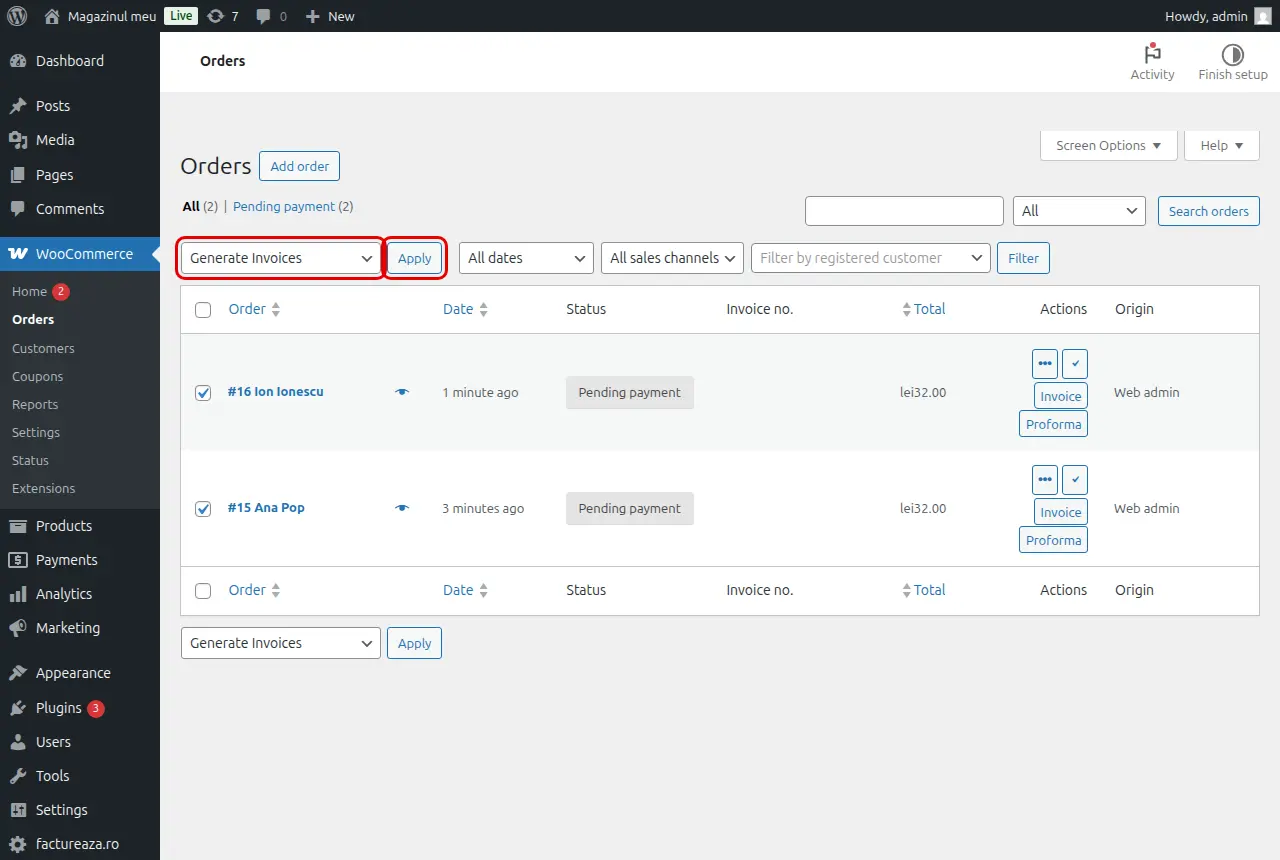
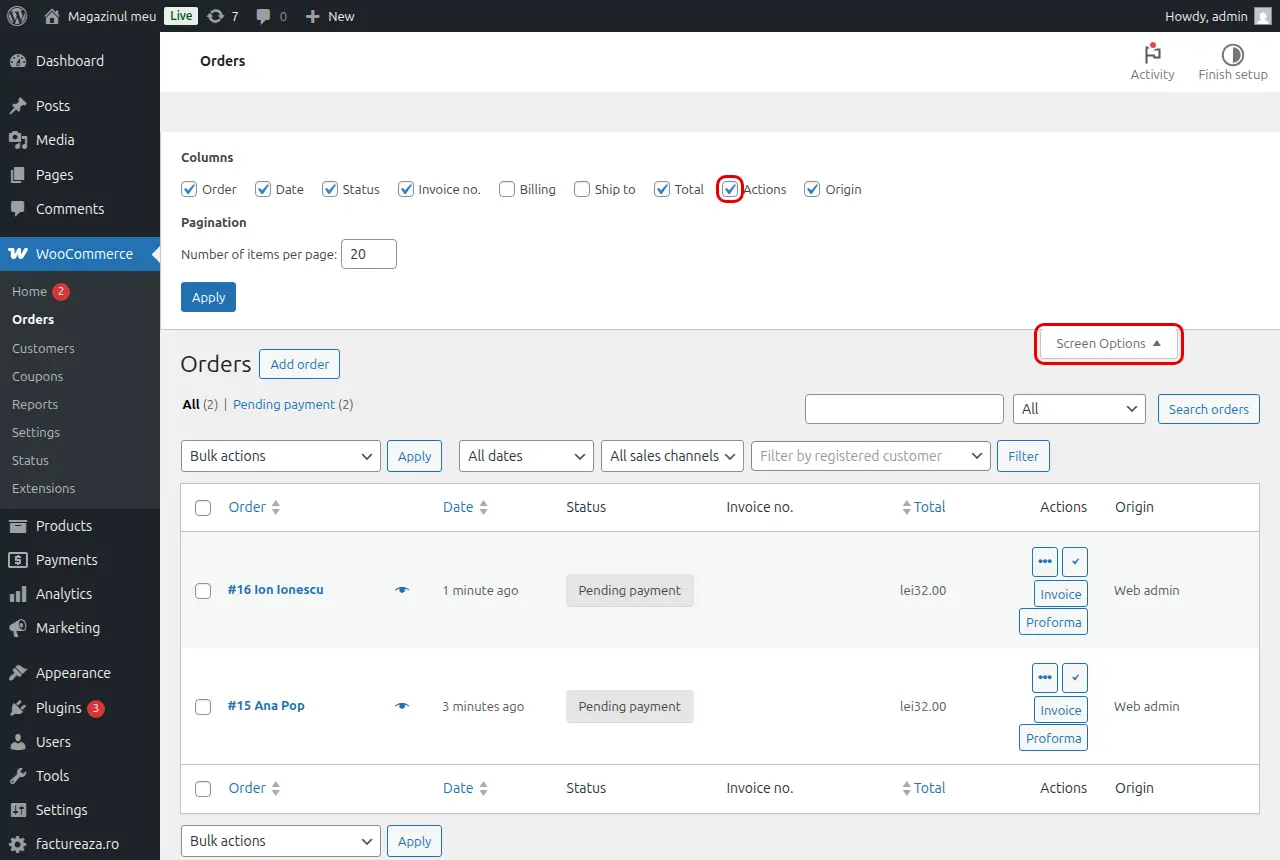
For one order, click the Invoice button in the Actions column. If you don't see the column, tick it under Screen Options at the top of the page, then click Apply. You can also issue the invoice from the order's own page, in the factureaza.ro box.
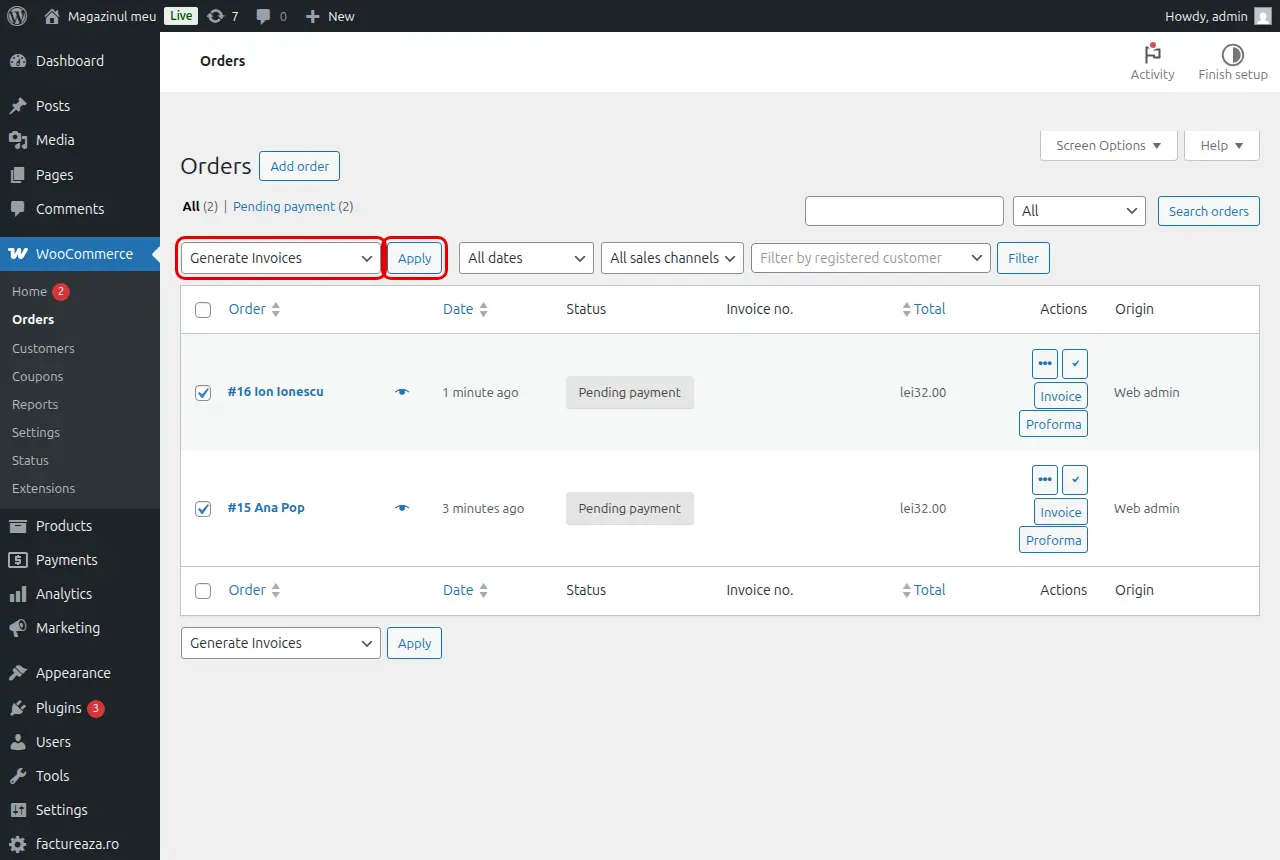
For several orders, tick them, choose Generate Invoices from the Bulk actions list and click Apply.
The invoice number appears in the Invoice no. column, and the factureaza.ro page in the WordPress menu lists the invoiced orders, with a link to each invoice.
Company details at checkout
WooCommerce does not ask for a company's billing details by default. Since version 1.7.0 the plugin asks for them itself, with no other plugin: the buyer chooses between individual and company, and a company enters its name, tax ID (CUI) and, optionally, its trade register number. They go on the invoice.
Under factureaza.ro › Settings, the Customer tab, Company details at checkout is ticked on a new install; if you updated from an older version, tick it yourself and click Submit. The fields work on the checkout block (WooCommerce 9.9 or newer) and on the classic checkout, in the language of the shop. On the order's page in the admin you can see the details and correct them before invoicing. A Romanian buyer's tax ID is checked (check digit), and individuals can get an optional CNP field.
If you use the "Facturare - Persoana Fizica sau Juridica" plugin, it is no longer needed, and future versions of this plugin will not support it. While it is active its fields stay at checkout. Click Switch now in the Customer tab to change to this plugin's fields, then Uninstall the Facturare plugin. The orders placed so far keep their company details.
If another plugin already asks for the tax ID at checkout, the settings name its fields and leave these off, so buyers are not asked twice.
VAT on the invoice
To include VAT on the invoice, add a tax in WooCommerce, and the plugin takes it as VAT. The steps are in the WooCommerce documentation.
Keep up the good work!
Înapoi la listă